© 2020 Hefei Better Technology Co., Ltd. All rights reserved.Site Map Designed by iwonder.cn
Tel
086-19155119097

Landscape fabric seems like the perfect solution for blocking weeds from popping up in your garden. It lasts a long time, can be easily trimmed to fit any size of space, and is relatively inexpensive. But even though this fabric is used throughout yards across the country, few homeowners know how to use it properly. Here's what you need to know about the best practices for when and how to use landscape fabric, plus essential maintenance tips.
Also called weed barrier or weed control fabric, landscape fabric is usually used to discourage weeds while allowing for movement of moisture both in and out of the soil. However, it isn't a permanent solution to controlling weeds (nature will find a way). Even when using landscape fabric, you'll still need to do some weeding.
Where to Use Landscape Fabric
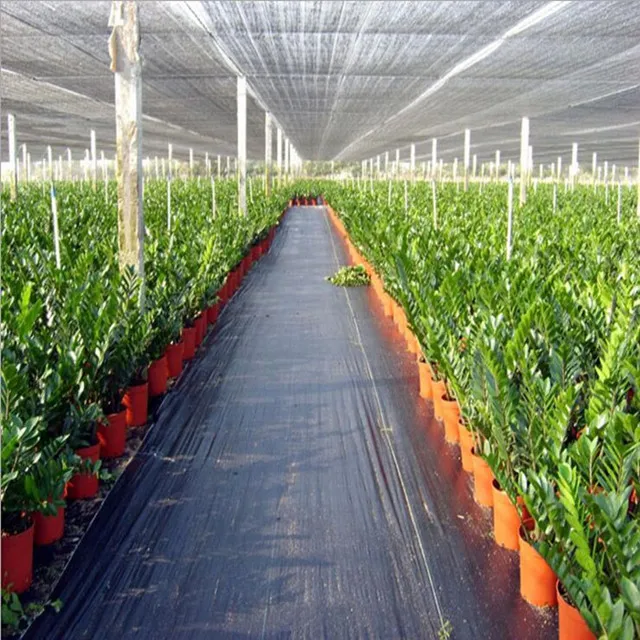
It's best to use landscape fabric under inorganic materials such as rock, gravel, or sand. Landscape fabrics are less effective when used under organic mulch such as wood chips or bark. As this mulch decomposes, it effectively creates a new layer of soil above the landscape fabric. Before long, weeds seeds will germinate and send roots through the fabric itself, making those weeds more difficult to uproot. That said, if leaves and other plant debris are allowed to collect on top of inorganic materials like gravel, the tiny pockets of soil that result can also be enough to give weeds a foothold.
If you're thinking about using landscape fabric over existing weeds and grass to smother it, this is not recommended. The area you want to cover should be stripped of all vegetation first to avoid tough weeds from poking through the material. Once holes have been opened in the fabric, they create an opportunity for more weed to become established.
This Clever Tool Pulls Weeds from Your Yard, so You Don't Have to Get on Your Hands and Knees
Landscape fabric has limited use in annual and perennial gardens where you would want to be doing a lot of digging and adding soil amendments like compost. It's easiest to use in places where you don't want anything to grow, such as under a deck or landscape pavers. You could also use it in smaller areas, such as around a tree, where you intend to rip up the fabric and replace it every couple of years.
How to Install Landscape Fabric
This easy-to-install landscape fabric is lighter than most, allowing for more water and air circulation. This landscape fabric is versatile for use with in-ground gardens and raised beds. Though it’s available in multiple siee-foot widths, this particular size is suitable for smaller gardens.
Step 1: Prepare the Soil
Landscape fabrics should be applied on bare soil so all weeds and other vegetation should be removed if necessary. If the area will be planted, mix in any desired fertilizers, compost, and other soil amendments. Then, level out the soil to avoid holes and divots that may accumulate water and cause drainage issues.
Step 2: Lay Out the Fabric
After the area has been prepped, measure out the amount of fabric you'll need to cover it. Make sure to allow a few inches of overhang on all sides. Lay the fabric onto the soil surface so that the edges of the pieces overlap each other by 6-8 inches. This will prevent weeds from growing through the seams and allow for a little movement.
Step 3: Secure to the Ground
One of the biggest mistakes people make when using landscape fabric is to not secure it in place with anything other than mulch. As the mulch breaks down or gets displaced, unsecured fabric can slide out of place and become an eyesore. Use landscape pins, aka garden staples, to secure the fabric to the soil. About one foot between pins is sufficient to hold the fabric in place. Excess fabric along edges can be doubled back or buried in the soil.
Step 4: Add Plants (Optional)
If you want to create a new garden in the area, set out your plants across the secured fabric where you want them to grow. Then, cut holes in the fabric just large enough to fit the root ball of the plant, leaving the pieces of fabric still partially attached. Cutouts can be slit down the middle and after plants have been set in place, fabric can be re-laid around plants to avoid soil exposure around the base of plants.
Step 5: Add Toppings
After all plants have been placed, add bark mulch, gravel, rock, etc. across the fabric at a depth of about two to three inches. Water any plants, directing the water at their base.